
Materials:

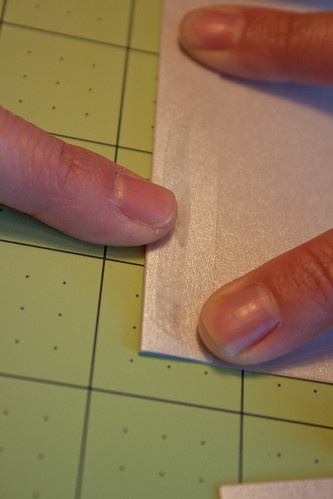
Score 0.5" from the edge on the 3 edges as shown.


- Martha Stewart scoring board (w/ 50% off coupon ~ $12.50)
- Fiskars paper trimmer (on hand)
- Aspire Petallics 8.5" x 11" 98#C-50 qty in Silver Ore ($22.50)
- Aspire Petallics A-7 80# envelopes- 100 qty in Silver Ore ($26)
- Exact Opaque 8.5" x 11" 65#C- 1 pkg in Yellow ($8.90)
- Single face satin ribbon in maize- 2 rolls @ 7/8" (~$3.50)
- Fiskars acrylic ruler (on hand)
- Fiskars self healing mat (on hand)
- Scotch permanent double sided tape- 4 individual rolls (~$20)
- X-acto knife (on hand)
- Scissors (on hand)
- Pencil & eraser (on hand)
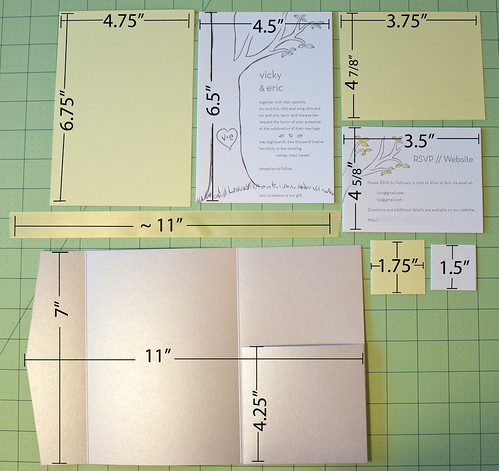
Measurements:
Before we get into detailed instructions, here are the major measurements:
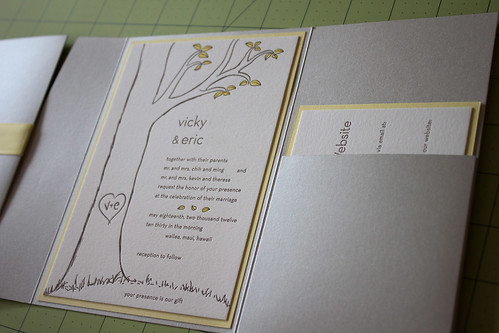
Pocket fold Instructions:
1. Cut your 8.5" x 11" card stock down to 7" x 11".
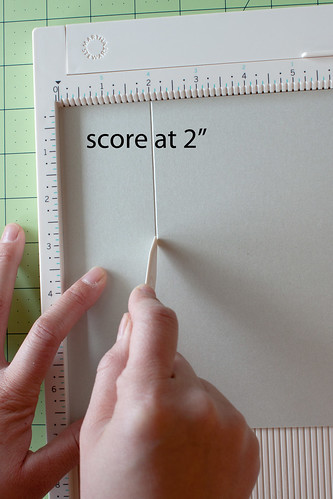
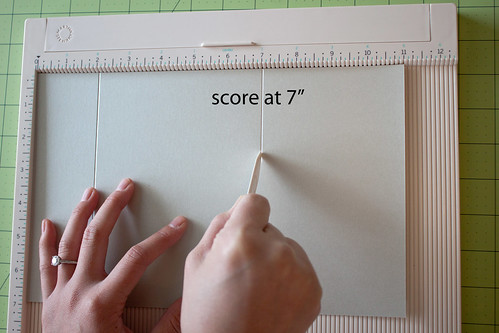
2. Score the paper parallel to the 7" side at the 2" (Fold A) mark and at the 7" (Fold B) mark:
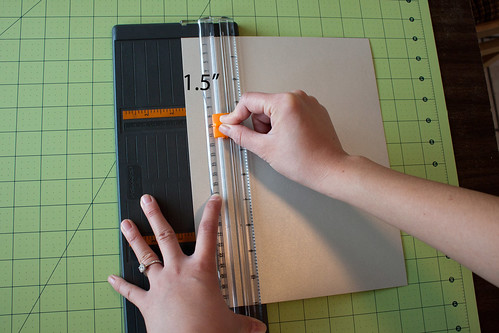
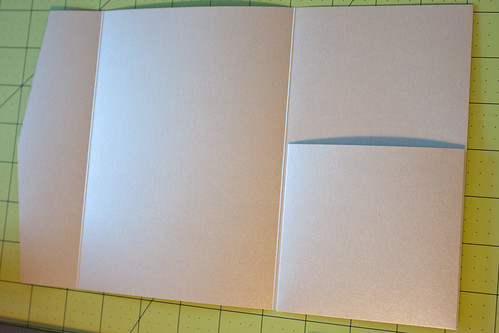
3. Mark 1.5" left of Fold A and 3.5" down the edge of Fold A with a pencil.

Line up the two points with your ruler and cut. These cuts give you the angled flap.
Line up the two points with your ruler and cut. These cuts give you the angled flap.
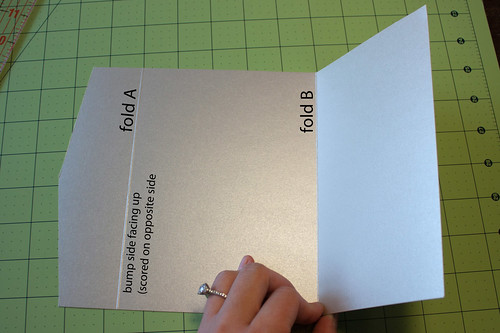
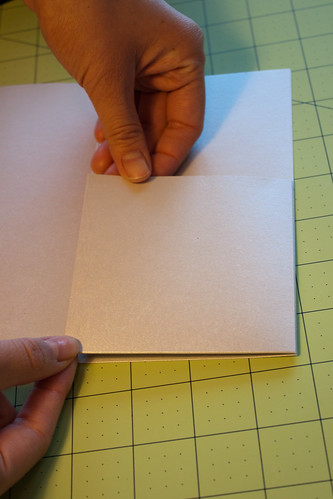
4. Flip card over so the bump from the scoring is facing up and Fold B in, then Fold A in.
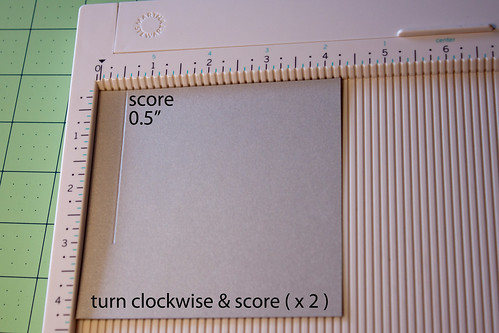
5. Using the same card stock, cut 4.25" x 4 15/16" for the pocket.
Score 0.5" from the edge on the 3 edges as shown.
6. Flip it over with bump side up and cut the dotted edges shown
Fold in.
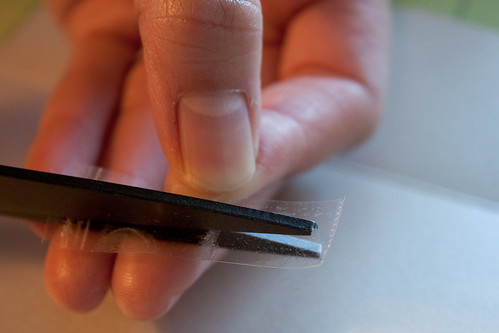
7. Cut the double sided tape in half. Using .25" tape, affix on all tabs. If you leave it at 0.5", it will go over the edge.
8. Place pocket onto the right panel of previously made folder.
Ta da!
Border instructions:
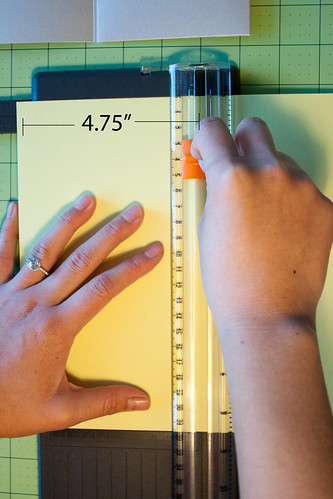
1. Using your border color paper, cut paper to 4.75" to 6.75" (gives you 1/8" edges all around). This is for the main invite in the center of your pocket fold.
2. For your RSVP/Insert for the pocket, cut paper to 3.75" x 4 7/8"
3. For your Monogram, cut paper to 1.75" x 1.75"
Assembling/Final touches:
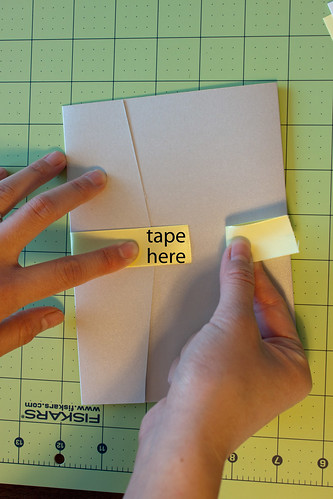
1. Cut ribbon to ~11"
2. Using 1/2" double sided tape, affix border mat onto pocket fold for the main invite, then invite onto the mat. Affix RSVP/insert onto its border mat and slide the matted RSVP/insert into its pocket.
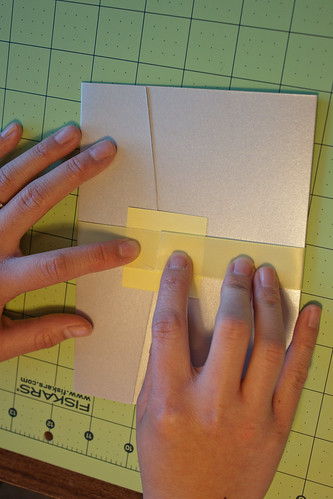
3. Close the invite to put ribbon finish. Wrap ribbon around pocket fold snug, not too tight, and use double sided tape to hold together.
4. Put the border color paper behind the ribbon, against the pocket fold and tape down.
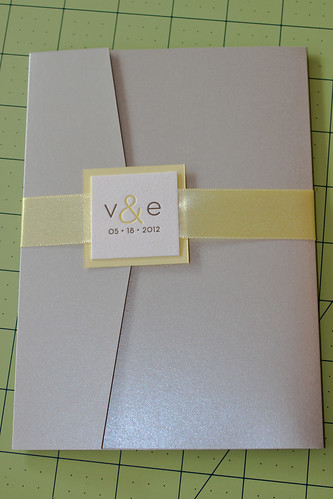
5. Put the monogram on top of the ribbon and tape down.
Voila! Now do this times 50, 100, or 200.
Previous tutorial: "How to print addresses on A-7 envelopes using Microsoft 2007"


Great invites! Where did you get the actual invitations with the tree printed?
ReplyDeleteThank you! The actual invitation with the tree design was something our friend helped us design.
DeleteYou created a great post with excellent information, i learn a lot of stuff from this article.
ReplyDeleteWedding Invitations
these are amazing....thank you!~ I would have otherwise spend 300 on some okay quincenera invites now I'm going to do these.... I love your tute
ReplyDeleteAwesome wedding invitations! I'm also browsing more so i could pin them on my Pinterest boards. Really lovely =D
ReplyDeleteI love this tutorial and I'm so glad I've found it....I've made 2 different types of invites one for a Quincenera and the other for a halloween party and everyone loved them....I'm going to share everyone your link because I honestly think you are so amazing....thank you for sharing these invites they look fancy and expensive but really I had everything
ReplyDeleteI was curious, what size envelopes did you use to mail them in? I'm going to be making mine in my wedding colors for our wedding invites! The scoring board allows you to also make envelopes so I wanted to know if you know the size of the folded up invitation so I could make the envelopes as well. Thank you for the tutorial, its a great one!
ReplyDeleteHi Emily, I used A7 envelopes. Details of the ones I used are in my post under "Materials." Good luck making your invitations!
ReplyDeleteFOR INVITATION CARD MAKING LOVER YOUR DIY WEDDING INVITATIONS TUTORIAL IS REALLY IMPRESSIVE & INFORMATIVE. TO MAKE CARD PERFECTLY YOUR STEPS ARE TRULY HELPFUL AND GIVE THE PLATFORM TO CREATE LOVELY INVITATION.
ReplyDelete________________________________
HINDU WEDDING INVITATIONS